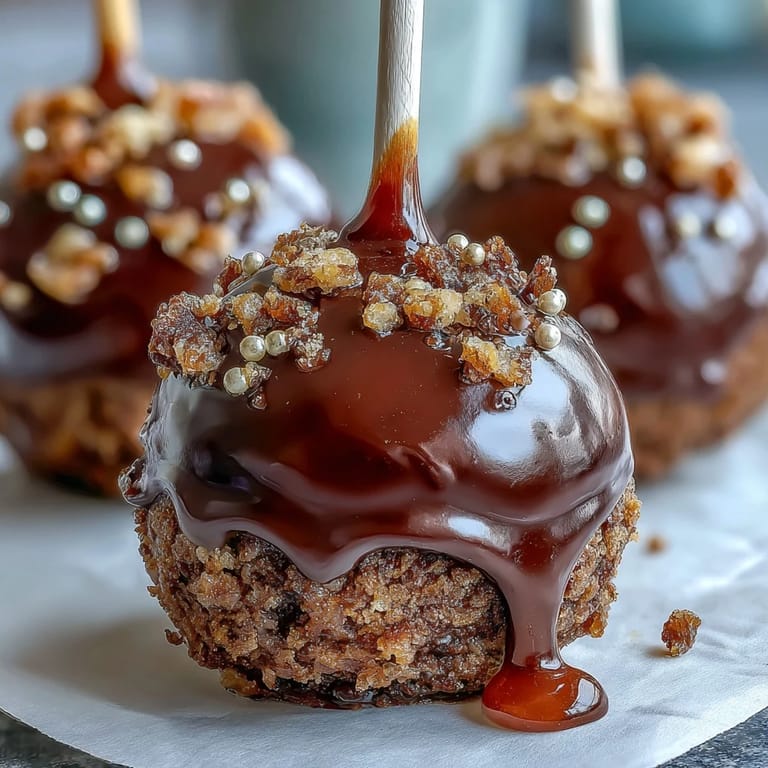
 Pin it
 My sister called me three days before St. Patrick's Day in a panic—she'd promised her kids something magical for their school party, and suddenly it hit her that she had no idea what to make. I was elbow-deep in laundry when she texted a photo of these glossy black cake pops crowned with gold, and something just clicked. Within an hour, I was melting candy in my kitchen, rolling chocolate cake into little spheres, and realizing that these tiny treats were going to be exactly the show-stopper she needed.
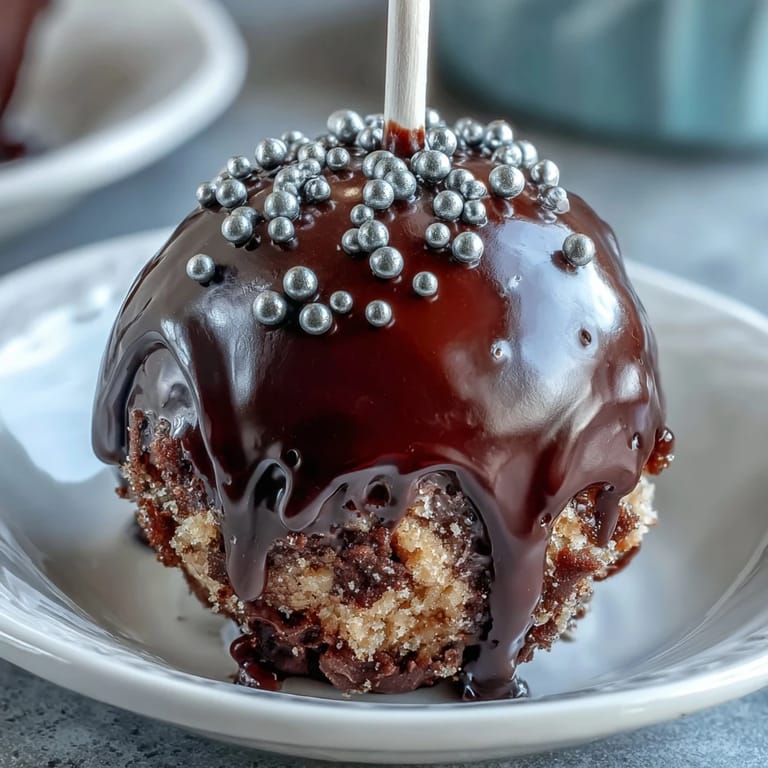
I'll never forget watching my niece's face when she bit into one at her classroom party—the way her eyes went wide when the gold sprinkles caught the light first, then the chocolatey explosion on her tongue. Her teacher texted a photo of the whole table crowded with kids reaching for the pot of gold pops, and that one image made every messy minute in my kitchen completely worth it.
Ingredients
- Chocolate cake mix (1 box, 400 g): The foundation of everything—a good quality box mix saves you time without sacrificing flavor, and the slight sweetness balances the rich frosting.
- Chocolate frosting (120 g or ½ cup): This is your binding agent and flavor anchor, so don't skip it or try to stretch it with something else.
- Black candy melts (400 g or 14 oz): These melt smoothly and set fast, creating that glossy pot exterior—regular chocolate can seize, so don't make that swap.
- Gold sprinkles or edible gold pearls (48 g or 2 oz): The star of the show that transforms simple cake pops into treasure, so buy the good stuff that actually glitters.
- Lollipop sticks (24): Wooden sticks work best because candy melts grip them better than plastic.
- White candy melts (50 g or 1.75 oz, optional): Perfect for piping delicate rims or accents if you want to get fancy.
- Green fondant or sprinkles (optional): The shamrock detail that ties the whole St. Patrick's Day theme together without feeling overdone.
Tired of Takeout? 🥡
Get 10 meals you can make faster than delivery arrives. Seriously.
One email. No spam. Unsubscribe anytime.
Instructions
- Bake and cool your cake:
- Follow the box directions exactly—don't guess on the baking time because an underbaked cake will crumble unevenly. Let it cool completely on a wire rack; warm cake will fall apart when you try to roll it.
- Crumble into submission:
- Break the cooled cake into fine, even crumbs using your hands or a fork—think breadcrumb texture, not chunks. This is actually kind of meditative if you let it be.
- Mix in the frosting:
- Add your chocolate frosting gradually and mix until the crumbs hold together like slightly wet sand. You want it to feel pliable but not gummy.
- Roll perfect spheres:
- Scoop roughly 1.5-inch balls and roll them between your palms until smooth, then flatten the tops just a touch so they sit like actual pots. This is where the magic starts to feel real.
- Chill for structure:
- Refrigerate for 30 minutes so the balls firm up enough to hold their shape during dipping. This step matters more than you'd think.
- Melt your black candy:
- Follow the package directions—usually this means microwaving in 20-second bursts and stirring between rounds. You want it thin enough to coat smoothly but thick enough to cling.
- Stick your pops:
- Dip each stick into melted candy, then push it halfway into a cake ball and chill for 10 minutes. This prevents the stick from sliding out when you dip the whole thing.
- The full dip:
- Hold each pop by the stick and dip it fully into the black candy melts, twisting gently to let excess drip off. Stand it upright in your cake pop stand while it sets—this prevents messy puddles.
- Gold while still wet:
- The second you stand each pop up, shower it with gold sprinkles before the black coating sets. Once it hardens, the gold won't stick as well, so timing is everything.
- Fancy rim work:
- If you're feeling it, melt white candy melts and pipe a thin line around the top edge of each pot using a squeeze bottle. This detail separates the casual from the showstopping.
- Shamrock accents (optional):
- Add green fondant shamrocks or a sprinkle of green before the black coating sets if you want that extra festive touch.
- Final set:
- Let everything cure completely at room temperature—usually 30 minutes to an hour—before moving them. Patience here prevents smudges and keeps them looking pristine.
 Pin it
 There's something about making desserts feel ceremonial, even when they're just cake and candy. When my niece brought those pops to school and came home with photos of the whole class gathered around them like they'd found actual treasure, I understood why people bake. It wasn't just about feeding people—it was about creating a moment worth remembering.
Making Them Ahead
The beauty of cake pops is that you can make them days in advance without any real compromise. Store them in an airtight container at room temperature for up to three days, and they'll taste just as good on day three as they did fresh. I've found that keeping them away from humidity is key—don't refrigerate them or they'll sweat and the coating gets weird.
Customizing for Different Diets
Making these gluten-free is straightforward—just swap in a gluten-free cake mix and check every label on your candy melts and sprinkles since hidden gluten loves to hide in the weirdest places. For dairy-free celebrations, there are now excellent dairy-free chocolate cake mixes and candy melts available at most grocery stores, though I've never personally tested them so you'll want to do a trial batch first. The gold sprinkles and fondant are usually safe across most diets, but always verify with whoever you're feeding.
Pairing and Serving Ideas
These shine brightest when served alongside something warm—Irish coffee with a dollop of whipped cream is the obvious choice, but hot chocolate works beautifully too if you're feeding a crowd with kids. The contrast between the cool, crispy candy shell and a warm beverage is genuinely magical. I once brought these to a dessert swap during a snowstorm, paired them with hot cider, and people talked about it for months.
- Set them out on a small wooden board or cake stand for maximum impact at your party.
- You can make these up to three days ahead, so bake on Thursday if your party is Saturday.
- If anyone has nut allergies, always double-check that your sprinkles and candy melts don't contain traces of tree nuts.
 Pin it
 These little pots of gold are proof that sometimes the simplest ideas—cake, frosting, candy, and a bit of sparkle—create something genuinely special. Make them, watch people's faces light up, and feel that quiet satisfaction of nailing something just right.
Recipe FAQs
- → How do I shape the cake balls to resemble pots?
After mixing the cake crumbs and frosting, roll the mixture into balls and gently flatten the tops slightly to create a pot-like shape before chilling.
- → What is the best way to avoid cracking when dipping in candy melts?
Chill the shaped cake balls thoroughly before dipping and allow the candy melts to be at the right temperature, ensuring a smooth and even coating.
- → Can I add decorations other than gold sprinkles?
Yes, optional decorations like green fondant or sprinkles can add a festive shamrock detail to enhance the theme.
- → How should these treats be stored after preparation?
Store in an airtight container at room temperature for up to three days to maintain freshness and texture.
- → Is it possible to make these gluten-free?
Substitute the cake mix with a gluten-free version and ensure all decoration ingredients are gluten-free to accommodate dietary needs.